MySQL’s UTF8 isn’t *really* UTF8 (and how to properly support Unicode)

I was forced to pull out my hair recently, after several SQL queries with UTF8 uni-coded text being fired from my project of the day, were failing to insert into my UTF8 MySQL database. Working on a project with a lot of middle eastern and asian content was simply crashing out my SQL insert queries and I was loosing a tremendous quantity of data.

Turns out MySQL’s UTF8 character set only partially implements proper UTF-8 encoding. It can only store UTF-8-encoded symbols that consist of one to three bytes; encoded symbols that take up four bytes aren’t supported. Luckily, MySQL 5.5.3 introduced a new encoding called utf8mb4 which maps to proper UTF-8 and thus fully supports Unicode, including astral symbols.

Switching from MySQL’s utf8 to utf8mb4

First, we need to change the character set and collation properties of the database, tables, and columns, to use utf8mb4, instead of utf8.

# For each database:
ALTER DATABASE database_name CHARACTER SET = utf8mb4 COLLATE utf8mb4_unicode_ci;
# For each table:
ALTER TABLE table_name CONVERT TO CHARACTER SET utf8mb4 COLLATE utf8mb4_unicode_ci;
# For each column:
ALTER TABLE table_name CHANGE column_name column_name VARCHAR(191) CHARACTER SET utf8mb4 COLLATE utf8mb4_unicode_ci;

Note: Don’t simply copy-paste this! You will need to tailor the queries to meet your specific requirements, the above lines are for illustrative purposes only.

Repair and optimize all tables:

Do this with some simple SQL Queries:

# For each table
REPAIR TABLE table_name;
OPTIMIZE TABLE table_name;

Or using the MySQL command-line:

$ mysqlcheck -u root -p --auto-repair --optimize --all-databases

Note: Don’t forget to change the character encoding for your PHP/Ruby code to use the correct character encoding – i.e. utf8mb4 instead of utf8.

Test the changes:

You can test that the changes have taken effect by running this command to see if the collation/charsets have been switched to utf8mb4:

SHOW VARIABLES WHERE Variable_name LIKE ’character\_set\_%’ OR Variable_name LIKE ’collation%’;

Alternatively, change the default character set in MySQL.

In the /etc/my.cnf config file, we set the following instructions:

[client]
default-character-set = utf8mb4

[mysql]
default-character-set = utf8mb4

[mysqld]
collation-server = utf8mb4_unicode_ci
init-connect='SET NAMES utf8mb4'
character-set-server = utf8mb4

That’s it. Obviously you will need to restart my SQL first though, and it will only apply to databases made after the default change, but I highly recommend this change. Even if you think you don’t need the full range of UTF8 characters, it only takes one to mess things up!

Conclusion

Never use utf8 in MySQL — always use utf8mb4 instead. Arbitrarily limiting the set of symbols you can use is just silly and is bound to cause a problem if your user is a young Japanese girl putting lots of cats in your strings. Why would you risk loosing lose data every time an Arabian user writes a message in their native locale. There’s no logical reason for it, and a few minutes of pain now, might save you a lot of heartache later. Do the right thing, and use utf8mb4 instead.

Using Ruby’s Metaprogramming to Initialize an Object From a Hash

Consider the code:

class A
  attr_accessor :b, :c, :d, :e, :h, :i, :x
end

Now imagine that you want to initialize each instance variable to the one that has the same name in the hash.. Imagine all the repetitive and crappy code that would generate.

But this is Ruby and with Ruby there is *nearly* always a better way.  Instead, meta-program it, and mix-it-in.

module constructed_from_hash
 def initialize(h)
  h.each { |k, v| send("#{k}=", v) }
 end
end

class A
 include constructed_from_hash
 attr_accessor :b, :c, :d, :e, :h, :i, :x
end

Nice, elegant and clean. Just the way Ruby code is supposed to be. AND this code will now scale, as more accessors are added to the object over time, the constructor too, wont need reprogramming. If you don’t need to do this often, you can pull just the constructor out of the module and put it directly into the class, but this way provides the most flexibility.

Header image taken from Examining Dwemthy’s Array composite pattern. An interesting read in it’s own right. check it out.

‘belongs_to’ and ‘has_one’ Differentiated

One of the more common confusions with ActiveRecord associations is the difference between the `has_one` and `belongs_to` relationships.

However, they are not interchangeable, and there are some serious differences. A `belongs_to` can only go in the class that holds the foreign key whereas `has_one` means that there is a foreign key in another table that references this class. So `has_one` can only go in a class that is referenced by a column in another table.

So this is wrong:

class Transaction < ActiveRecord::Base
  # The transactions table has a order_id  
  has_one :order                
end

class Order < ActiveRecord::Base
  # The orders table has a transaction_id
  has_one :transaction          
end

So is this:

class Transaction < ActiveRecord::Base
  # The transactions table has a order_id
  belongs_to :order             
end

class Order < ActiveRecord::Base
  # The orders table has a transaction_id
  belongs_to :transaction     
end

For a two-way association, you need one of each, and they have to go in the right class. Even for a one-way association, it matters which one you use, and which direction you use it:

class Transaction < ActiveRecord::Base
  # This table has no foreign keys
  has_one :order             
end

class Order < ActiveRecord::Base
  # The orders table has a transaction_id
  belongs_to :transaction     
end

System-wide Git Global Ignores

If you are like me and love using a Mac for your development tasks, and want a way to get Git to ignore any file (like those pesky .ds_store’s) forever and for EVERY repository there is a very simple way to it.

Open Terminal and type:

git config --global core.excludesfile ~/.gitignore

and then:

echo .DS_Store >> ~/.gitignore

This will work for anything you want, just modify the second command as appropriate.  And you can run the second command as many times as you need.

Ruby Script to Import Google Contact Photos From Gravatar

Google Contact photos are a much neglected feature of the Google Stack. It really adds to the user experience when you see each of your contact photos when you make or receive a call. However, it can be a real pain (especially if you have hundreds of contacts).

But I had an idea recently, to try and match my Google Contact emails with Gravatar and try to auto-populate some of the dozens of contacts that didn’t already have a photo (after all a Gravatar is better than nothing).

So I wrote a Ruby script to find my contacts missing a photo and try to update it with a Gravatar (wherever possible). NB: You may need to first install the GData (Google Data) gem by opening a Terminal window and issuing: sudo gem install gdata.

#!/usr/bin/env ruby

# Google Contact Photos - Gravatar Importer
# Written by Ashley Angell
# http://ashleyangell.com
# Licenced under Creative Commons with Attribution

require "rubygems"
require "gdata"
require "rexml/document"
require "digest/md5"
require "net/http"
include REXML

none = 'd5fe5cbcc31cff5f8ac010db72eb000c'
user = ARGV[0]
pass = ARGV[1]

client = GData::Client::Contacts.new
client.clientlogin(user, pass)
data = client.get("https://www.google.com/m8/feeds/contacts/#{user}/full?max-results=10000")
myxml = Document.new data.body
p "contacts"
puts "-"*70
i = 0
myxml.each_element("feed/entry") do |e|
  begin
    gd = e.elements['gd:email']
    if !gd.nil?
      email = gd.attributes['address'].downcase
      hash = Digest::MD5.hexdigest(email)
      image_src = "http://www.gravatar.com/avatar/#{hash}"
      nil_image = false
      image_element = e.get_elements("link[@rel='http://schemas.google.com/contacts/2008/rel#photo']")[0]
      if !image_element.nil? and image_element.attributes['gd:etag'].nil?
        data = nil
        md5 = nil
        Net::HTTP.start(URI.parse(image_src).host) do |http|
          resp = http.get(URI.parse(image_src).path)
          data = resp.body
          md5 = Digest::MD5.hexdigest(data)
          File.open("#{email}.png", 'w') do |f|
            f.puts data if md5 != none
          end
        end
        md5 = Digest::MD5.hexdigest(data)
        if md5 != none
          puts "#{email} > #{image_src}"
          client.put_file(image_element.attributes['href'], "#{email}.png", 'image/png')
          i = i + 1
        else
          puts "#{email} > no match"
        end
      else
        puts "#{email} > skipped (already has photo)"
      end
      File.delete("#{email}.png") if File.exists?("#{email}.png")
    end
  rescue Exception => ex
    puts ex
  end
end
puts "Updated #{i} contact photos"

To execute it, simply copy and paste this into a text editor (or download it and unzip) and from Terminal (command) window and execute the following commands:

sudo chmod +x googlegravatarimporter.rb [Enter]
./googlegravatarer.rb your.address@gmail.com your_password [Enter]

It will cycle through your Google Contacts and indicate what action was taken. For me, surprisingly updated a few dozen contacts (even more than I expected).

I’ve posted this here for others that might want to do the same thing but cannot be bothered writing the script for it. Consider it posted here under Creative Commons with Attribution.

Adding Wiki Style Functionality to Your Rails Site Using 'acts_as_versioned'

If you need to add basic wiki style functionality to your Ruby on Rails models, there is a really easy way to get similar model versioning without having to resort to cutting the code yourself.

The acts_as_versioned ‘plugin’ has been available for quite some time, but its been made far better by it now becoming a gem instead of an old-school plugin. The authors have gone to considerable effort to make it as painless as possible to use.

This post, is designed to give you a brief over-view into how to get up and running with with models which ‘acts_as_versioned’.  Because its the current version (at time of posting) and because its awesome, this walk-though assumes that you are using Rails 3, not 2.  The instructions for Rails 2 sites are similar, but you’ll need to tweak this for it to work.

First, you need to grab the gem:

sudo gem install acts_as_versioned

Next, add the dependency to the ‘Gemfile’, it doesn’t matter too much where it goes, I stuck it somewhere in the middle:

gem 'acts_as_versioned', '0.6.0'

Next, just under the ‘ActiveRecord::Base’ line in the model’s class file, instruct the class that its to act as a versioned model.

class Article < ActiveRecord::Base
  acts_as_versioned
end

Then, in the migration file you need to execute the model's method to create the version table.  This is key because the acts_as_versioned gem actually creates an additional database table to house all the previous versions of a given record.  Obviously, you need to delete the table is the schema is taken down.  My migration now looks like:

class CreateArticles < ActiveRecord::Migration
  def self.up
    create_table :article do |t|
      t.string :title
      t.string :body
      t.integer :user_id

      t.timestamps
    end
    Article.create_versioned_table
  end

  def self.down
    drop_table :articles
    Article.drop_versioned_table
  end
end

The key method is the

Article.create_versioned_table

which creates the version table of the model. Now, get rake to create the database:

 rake db:migrate

Thats it!  Its done.  Using acts_as_versioned is simple. I'll provide some examples, where '@article' represents an instance of a model setup 'acts_as_versioned'. To find the current version of an article you can use the version property:

@article.version 

But just performing a normal ActiveRecord lookup returns the most current version anyway, so to revert to a previous version use the revert_to method on an article instance:

@article.revert_to(version_number)

You can save (just like you've done a hundred times before) a previous version as the current on by using the save method. The save on a reverted articles will just create a new version.

To get the number of versions:

@article.versions.size

Since '@article.versions' returns an array of versions, you can do neat things like this:

History

<% for version in @article.versions.reverse %> Version <%= version.version %> <%= link_to '(revert to this version)', :action => 'revert_to_version', :version => version.id, :id => @article %>
<% end %>

Obviously for this to work, you'd need to create a 'revert_to_version' action in the appropriate controller, but you get the idea.

acts_as_versioned is an amazing piece of work, and aside from the wiki-like functionality it gives you for very little effort, I can imagine scenarios such as audit and trace logs and "undo" features which could really benefit from this little gem.

Using Rails’ Flash Messages with AJAX Requests

Have you ever wondered how to get access to the Ruby on Rails‘ flash message when performing a AJAX or restful web request?  You might hit yourself on the head when you discover how easy it is.  Simply append the flash message to the Response headers.  You could even wrap this in a helper, and using an after_filter to automatically add the header for you on every AJAX response.

class ApplicationController < ActionController::Base
after_filter :flash_headers

def flash_headers
  # This will discontinue execution if Rails detects that the request is not
  # from an AJAX request, i.e. the header wont be added for normal requests
  return unless request.xhr?

  # Add the appropriate flash messages to the header, add or remove as
  # needed, but I think you'll get the point
  response.headers['x-flash'] = flash[:error]  unless flash[:error].blank?
  response.headers['x-flash'] = flash[:notice]  unless flash[:notice].blank?
  response.headers['x-flash'] = flash[:warning]  unless flash[:warning].blank?

  # Stops the flash appearing when you next refresh the page
  flash.discard
end

And then you just read the header with whatever you happen to be reading it with. For completeness sake here is an example of how to read the header in JavaScript using Prototype:

 new Ajax.Request('/your/url', {
  onSuccess: function(response) {
    var flash = response.getHeader('x-flash);
    if (flash) alert(flash);
 }
});

Forget the UML Module for NetBeans!

A while ago, I wrote a blog post on how, with considerable effort, you can get a native UML NetBeans module up and running despite the NetBeans UML module being removed from the standard distribution.

I managed to get mine working, but there is a huge cost – Once you close the project (or the IDE) housing the diagram, you can never reopen it.  Out of pure determination desperation and perseverance I managed to get the diagram I needed, printed and done; but I can never open it and make adjustments.

Apparently, we’re all supposed to use SDE for NetBeans by Visual Paradigm now as the “official” replacement, but I tried it, and it was simply fail.  Proprietary and fail.

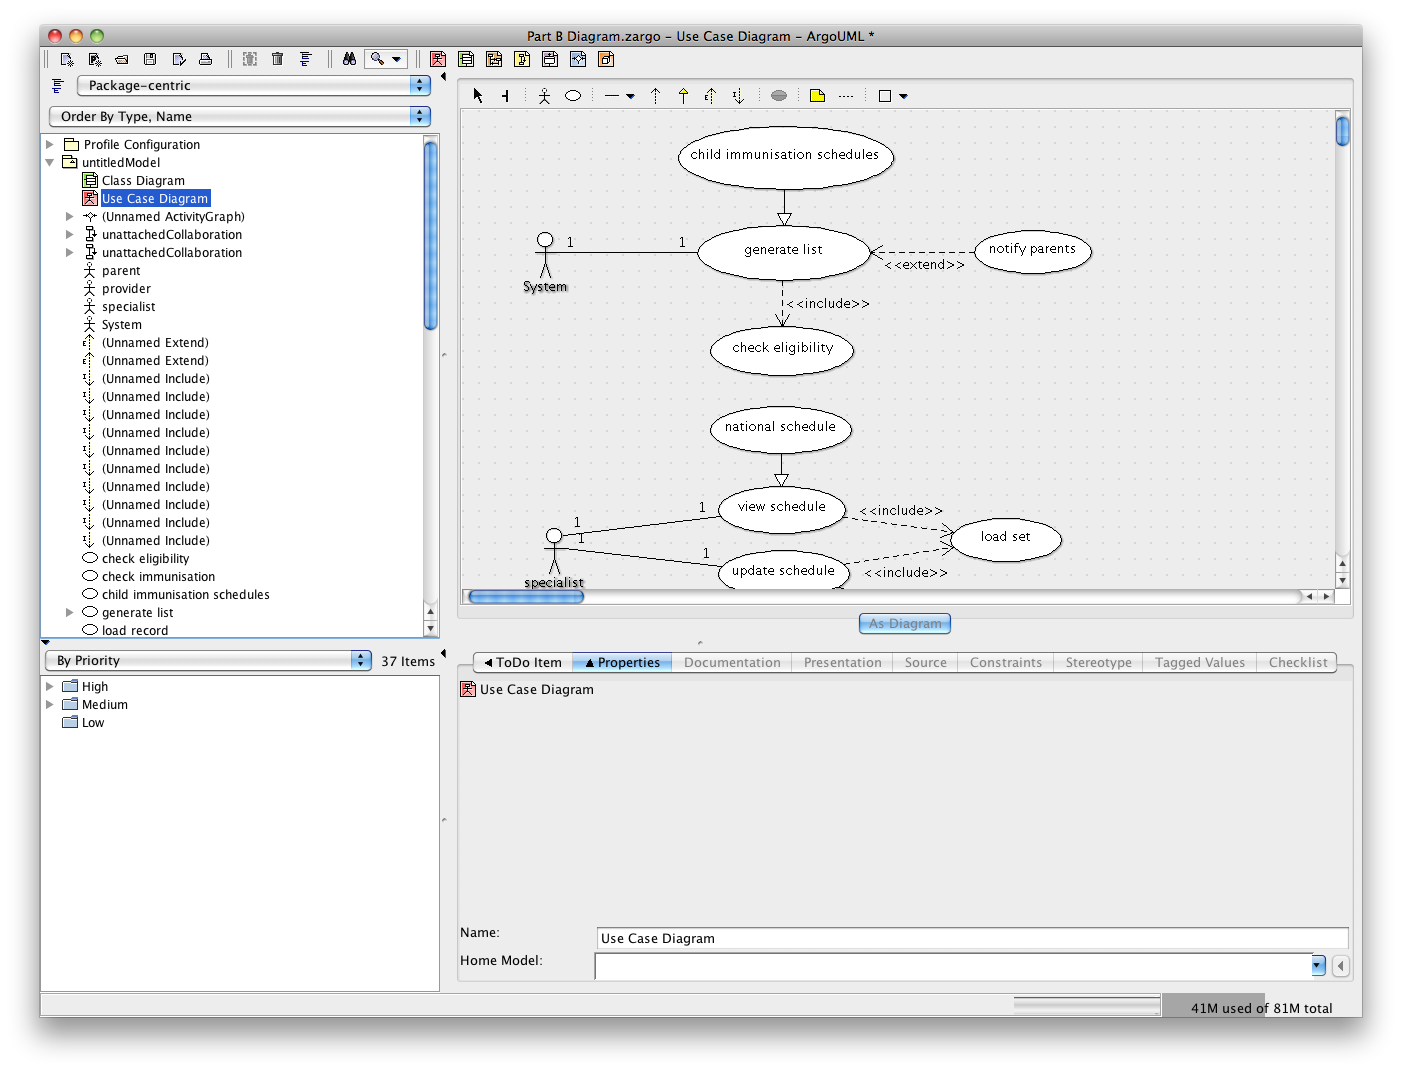
Fortunately, after taking a punt, I found a UML modelling tool which is not only more functional and better than the NetBean’s module was, but looks better too.  It even has the ability to create code from class diagrams (which you can obviously just cut and paste into your NetBeans IDE project of choice.  Its called ArgoUML.

ArgoUML is the leading open source UML modeling tool and includes support for all standard UML 1.4 diagrams. It runs on any Java platform and is available in ten languages.

I’ve used it a bit now, and I just love it.  I particularly like the way it can make recommendations on how to improve your diagram using its “critics” system.

It’s features boast:

  • All 9 UML 1.4 Diagrams supported
  • Platform Independent: Java 5+
  • Click and Go! with Java Web Start
  • Standard UML 1.4 Metamodel
  • UML Profile support with profiles provided
  • XMI Support
  • Export Diagrams as GIF, PNG, PS, EPS, PGML and SVG
  • Available in ten languages – EN, EN-GB, DE, ES, IT, RU, FR, NB, PT, ZH
  • Advanced diagram editing and Zoom
  • OCL Support
  • Forward Engineering
  • Reverse Engineering / Jar/class file Import
  • Cognitive Support
    • Reflection-in-action
      • Design Critics
      • Corrective Automations (partially implemented)
      • “To Do” List
      • User model (partially implemented)
    • Opportunistic Design
      • “To Do” List
      • Checklists
    • Comprehension and Problem Solving
      • Explorer Perspectives
      • Multiple, Overlapping Views

I haven’t yet worked out how to create object instances from my class diagrams yet, so I’m not sure if it just doesn’t support this or it’s user error, but in every other conceivable way, it seems to be an excellent UML modelling application for virtually every OS you can name.

Ruby Code to Scrape Images from TwitPic URLs

Twitpic logo

I’ve been trying to find an easy way to re-grab my TwitPic images back off TwitPic to be re-syndicated on a communal family website I am trying to create.  I found a great site which had some Rails code that scraped the image, so I took the code and modified it to make it compatible for pure Ruby (too be honest it didn’t need much modifying at all) .

Here’s my modified snippet of code that I’ve been using to grab the image from Twitpic with the Hpricot gem:

require 'rubygems'
require 'net/http'
require 'hpricot'

def rip_twitpic(url)
  begin
    code=url.match(/[w]+$/).to_s
    unless code.empty?
      uri=URI.parse(url)
      resp=Net::HTTP.get_response(uri)
      html=Hpricot(resp.body)
      html.at("#photo-display")['src']
    end
  rescue Exception => e
    puts "Error extracting twitpic: #{e}"
    url
  end
end

Just as it appears, this method will return the URL of the image embedded on the page that the TwitPic URL points too.

This will form the core part of a little project which will allow you to scrape TwitPic images and send them to a server of your choosing. I’ll try to release this ASAP but in the meantime, I thought a few of you might find this useful. I know I do.

Getting SSI to work in MAMP

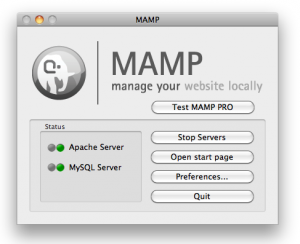
It’s no secret that I adore my Mac, mostly because it just makes my life easier.  I enjoy the security of OSX, I love it’s responsiveness and I love that my operating system doesn’t punish me for installing applications and development stacks just to ‘play with them’.  A while ago, while looking for a stack that would let me quickly and effortlessly get Apache, MySQL and PHP5 working together without having to muss about with configs and the such, I discovered MAMP and frankly, I adored it instantly.  After a rather large download, it was effortless to install and running it was a cinch.  And better still, the server applications only run when you open the MAMP application and tell them to run, so that you dont loose vital system resources running services you dont need.

Additionally, my IDE of choice, NetBeans can integrate directly with MAMP, so that when you create (for sake of argument) a new PHP project and run it, it automatically puts the project files into the MAMP Apache directory (to be honest you do need to configure the path when you create the project, but its no big deal) making development painless and convenient.

But I did hit a snag recently when for a university assignment I was required to do a XHTML website using HTML Server Side Includes.  I was shocked when I ran my website and my SSI didnt work.

But there is a solution.

To make .shtml work, I deleted the comment-symbols ( # ) in the file http.conf (find it in /Applications/MAMP/conf/apache/ and at the time of writing was near lines 982:

# To parse .shtml files for server-side includes (SSI):
# (You will also need to add "Includes" to the "Options" directive.)
#
AddType text/html .shtml
AddOutputFilter INCLUDES .shtml